Pit firing
I recently had a chance to do a pit firing with Hilary Chan. He’s a great guy with a fairly fascinating ceramics blog. One of the most exciting things about doing the pit firing with him is the way he approaches it so scientifically. He’s from a tech background, and has made a scientific approach a key part of his artist process. While I try and take the occasional note (seldom referring back to them), this man is as thorough and as consistent as I could ever dream to be . He photographs every piece during ever stage of preparation and firing. He works to build theories from his notes, striving to prove or disprove them every firing. As someone from a scientific background myself, I found it awesome and inspiring. The whole experience has impressed in me the idea of pit firing as a petri dish, a small scale arena to experiment and explore, as I wait for the fall wood firing. Anyway, scientific musing aside, I figured it would be fun to explain exactly what a pit firing entails.
Pit firing is a very primative firing method. By primitive, I don’t mean unsophisticated, but rather ancient. Basically, as most cultures developed ceramics, some sort of pit firing was first way that folks figured out how fire their pots. It’s pretty low temperature, which means the finished pieces aren’t super sturdy and can’t be covered in glaze, like you can with higher temperature firings. However, it’s hot enough the pot isn’t going to dissolve back into mud if you put water in it, which is pretty darn useful for an emerging civilization. While most cultures figure out how to build kilns, and to heat their pottery to higher temperatures, some stuck with pit firing, developing the method to create incredibly beautiful work. The example that always comes to my mind is the pueblo potters of the southwest united states, including the beautiful black on black work by Maria Martinez.

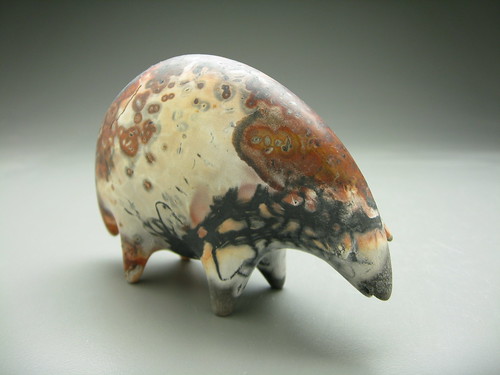
There seems to be nearly infinite ways of setting up and doing a pit firing, so I’m going to stick to describing the pit firing I did with Hilary. We did the largest bit of preparation before hand. Each piece was wrapped in copped wire (specifically, a choreboy, those copper things made for scrubbing pans.), followed by steel wool, followed by salt water soaked burlap or straw. All of the salt, the copper, and the iron all fume at high temperature, leaving an assortment of colors on the clay. Once that initial prep was done, we placed each one in a labeled brown paper bag, ready for the fire pit. For my pieces, we had to experiment some, putting protective grills above the pieces, to avoid snapping of wings and beaks. I feel like figuring out how to protect my delicate beasts is going to be the biggest issue for my exploration of pit firing. As we loaded the pit itself, we put down layers of sawdust, copper carbonate, horse manure, paper, and wood. I actually made a timelapse of the whole loading process that sums up the set up pretty well.
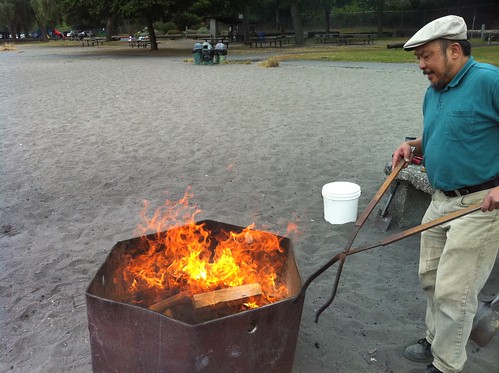
The whole firing, once we lit it up, took maybe an hour. We had campfire sized flames for even far less than that. The only time issue was the cooling of the pieces. We let everything cool for an hour or two, before my impatience got the better of me and I started digging out pieces. The results were great, but the rapid cooling just proved too much for pieces, leaving several with cracks. Apparently, the number one way to avoid this is to let the pieces cool in the ashes over night, which brings me back to the idea of my very own mini-firepit, in my very own backyard. I have some plans as far as that, but that’s for another time.