It’s been a very busy week, but then again, I suppose nearly all of my weeks here have been and will be very busy. With only five week here, time seems to go by so quickly.
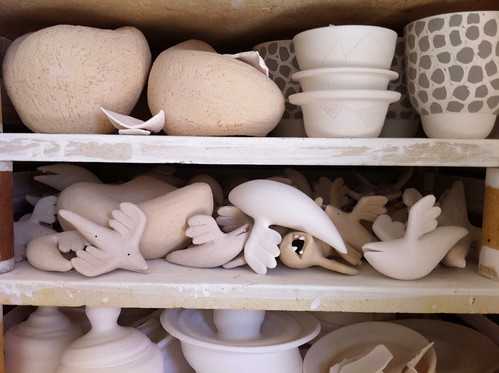
Anyway, the first half of this week was consumed by finishing every possible sculpture I could, so they could be soda fired. The plan was to load the big bisque kiln on Monday, giving it plenty of time to cool before we loaded the soda on Thursday.It’s been a bit rough doing my main firing only 3 weeks into my time here, but fellow artist Jody was about to return to Canada, meaning if we wanted to fire together we had to fire this week. It’s worked out for me though, since I managed to finish 90 flying beasts, which wasn’t far from my goal of 100.
So after about a full week of last minute frantic studio work, Jody and I loaded up the Guldagergaard wood-soda kiln on Thursday. The kiln is a small little beast, with a capacity of 300 liters/ 10.5 cubic feet. It’s also a very different type of kiln for me, since I’ve only really fired an anagama and a train kiln. This guy is a cross draft kiln, with a firebox located underneath the ware chamber. It’s weird. It wasn’t like stoking a firebox, it was like stoking a conveyor belt. It wasn’t so much much a rhythm of “stoke, see how the temperature responds, adjust”, as it was a constant process of stoking, gradually pushing the wood further in the the kiln, and constantly adjusting. It was like switching from a Sousa march to one of the Bach cello suites. Looking around online, it visually looks a bit similar to the “phoenix kiln” in a book by Jack Troy, which was mentioned on Carl Gray’s website. The main differences are the fact that the firebox has a flat, not arched roof, and the chimney is on the side, not the front.
Anyway, due to some last minute kiln maintenance work, we didn’t get the kiln started until about 9pm on Thursday night. The plan was to fire for about 20 hours, waiting to put the soda into the kiln until cone nine on the bottom of the kiln had fallen. Sounds good, as far as plans go. However, life is seldom that simple. By hour 22 or so we had cone 9 down on the top, but had barely moved cone 8 on the bottom. It took easily another 4 hours of struggle before finally dropped the lower cone nine, by which point we’d also dropped cone 11 on the top of the kiln. In all, the firing took us 28 hours, which was pretty exhausting for just two people, especially since we were also constantly splitting more wood.
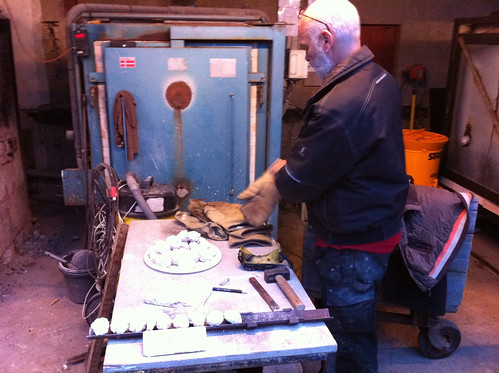
Richard, the tech, had to leave for the night before we were ready to put the soda in the kiln, but here’s a shot of him explaining the soda balls to us. We were using a method developed by Gail Nichols, generally referred to as soda balls/bombs/burritos. In previous soda firings that I’ve done, people have used the more traditional method of spraying in a mixture of water, soda ash, and sodium bicarbonate into the kiln. However, it seems like Nichols’s soda bomb method is taking off, which is understandable if you’ve seen how amazing her work looks. Basically, you mix soda ash, sodium bicarbonate, and whiting together, and add just enough water to form it in to balls. These balls then solidify to rocks, which you then dump into the firebox. The soda then vaporizes in the firebox, distributing itself around the kiln. I haven’t done much soda firing, but I would love to play around with it some more if the results from this firing are promising.
Anyway, at this point, we’re stuck waiting for the kiln to cool, and catching up on sleep. I’ll let everyone know what the results look like once we unload it!
Tags: ceramics, clay, guldagergaard, soda, sodafiring, woodfiring


Oh man, your nests will look excellent with the colors on Gail Nichols front page. Looking forward to the results!