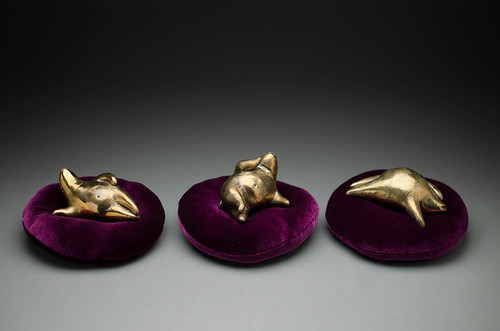
This summer, I decided to follow up on something I’d enjoyed in college, but hadn’t had a chance to explore further – metal casting. I signed up for a class at our local Pratt Fine Art Center, and spent several weeks building waxes and eventually casting a small set of bronze pieces. While I’m taking my time finishing up the finished bronzes, I thought I might write up a bit about the process in the meantime. It’s such a massive process, I decided it would make sense to cover it in two halves: creating the waxes, and investing and casting them. At some point in the future, I’ll try and write a bit about my experimentation with patinas, but I’m only getting started with that. In the mean time, I’ve collected all the pictures of the process into one set on flickr.
As the name suggests, in lost wax casting, you create a form in wax, sink (invest) that form into plaster, turn the plaster mold upside down in a kiln, cook it until the wax is all melted out, and then you pour the bronze into the void left by the missing wax. It’s a pretty straight forward method, but it means that you’ll be spending quite some time getting everything just right with your wax form. I’m OK with this, since it’s easier for me to fix wax than to fix bronze.
While you can sculpt your form directly in the wax, it’s more common to first sculpt your piece in something else, such as clay, and create a mold from it. This is because ideally, your wax form will just be a shell of 1/8″ thickness or so. Any extra wax used will result in extra metal being used in the casting, making your piece heavier and more expensive.
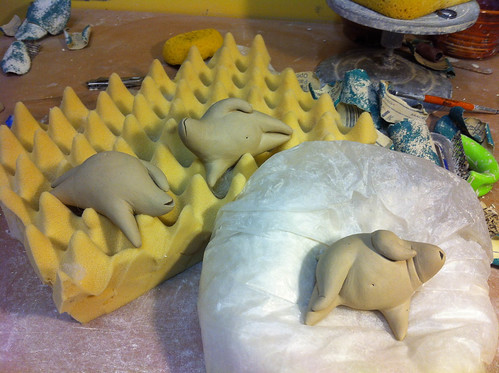
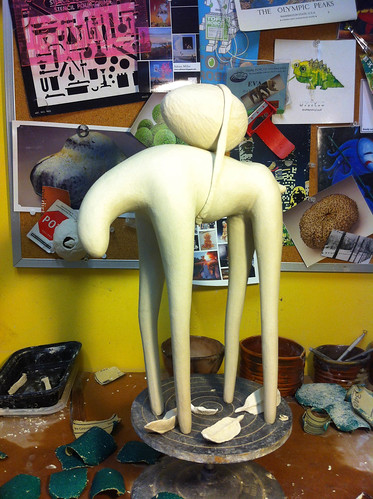
Most artists will sculpt their forms out of solid clay, perhaps over an armature. I decided to cast two sets of work. The first set was to be three sets of three fat, little odalisques – I decided if I was going for bronze, I’d go to the classics for inspiration. The odalisques I sculpted in my normal fashion – hollow, built up starting from two little pinch pots. The second form I went for was built solid, with metal armature in the legs. I’ve been calling him The Walker. I don’t have a final title for him since I still need to put some finish touches on him. For The Walker, I decided to create a mixed media beast – a clay egg, a leather belt holding it on, and perhaps clay feathers surrounding it. I knew bronze would give me a chance to make legs longer and thinner than I ever could in woodfire. It also was going to be a interesting to make a mixed media form where I wouldn’t have to worry about shrinkage. My clay shrinks 14% or so, but the wax will be identical to the bronze. If I fitted the wax beast with finished mixed media parts, the same parts will still fit on the finished bronze.
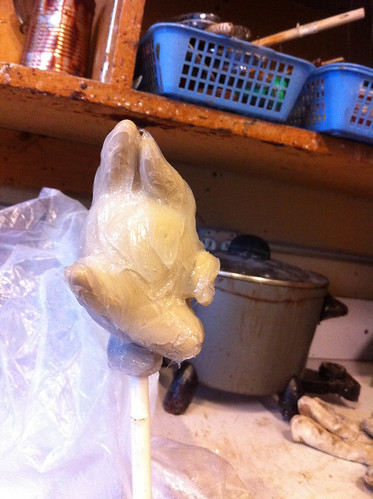
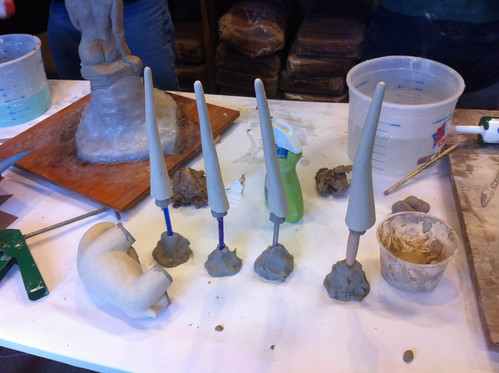
For the Odalisques, the mold making was extremely straight forward. There an almost no end of different mold materials out there, ranging from commercial two part rubber mold kits to old school plaster. The material I used primarily was silicone caulk, specifically GE Silicone II (not I). It has great fidelity, is easy to use, and is quite cheap. The main downside seems to be that it stinks to high heaven. Pay attention to ventilation if you try this. Anyway, Silicone II can be applied directly to clay, and then peeled off later. If you apply it to some other materials, like metal, you might need to put a coat of Vaseline on first. By applying three 1/8″ coats of Silicone II, you can built up a fairly respectable rubber mold. For each of the three odalisques, I embedded them on a pole to hold it still, and then built up a bit of extra clay around the pole. In this silicone mold, this represented the opening through which I’d later pour in the wax. I removed the finished mold by slicing it slightly with an razor, just enough to pull the mold off the clay. Later when I poured in the wax, I could stabilize the mold just by holding it in one hand as the wax cooled.
The mold for the Walker was a bit different. Being such a large beast, I cut it into sections, and made individual molds of each leg. The body was also given a silicone mold. However, the body was large enough that the silicone mold would have been too wobbly to use without some sort of reinforcement. Therefore, I made a “mother mold” out of plaster, that would surround the silicon mold and hold it steady as the wax was poured in.
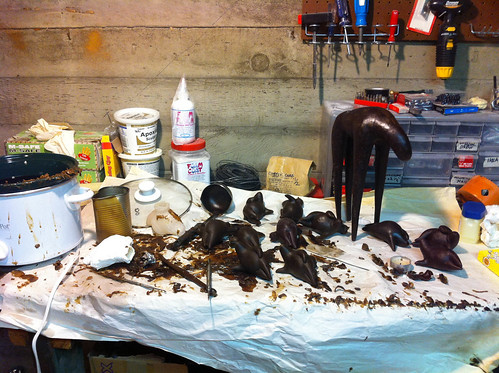
Bronze casting is interesting. The joke folks were making in the class is that is that it’s three times the work, for one third the finished pieces. First you sculpt it in clay, then you sculpt it again in wax, then you sculpt it one more time in bronze. I suspect the better you get, the more streamlined the process is. However, as a novice, that was definitely true for me. Once the wax forms were cast, I had to repair and reassemble them.The spouts where the wax had been poured into the molds had to be removed and patched over, and the legs of the tall beast reattached. It took a lot of fiddling, but eventually I got to the point where I had a finished version of each piece.
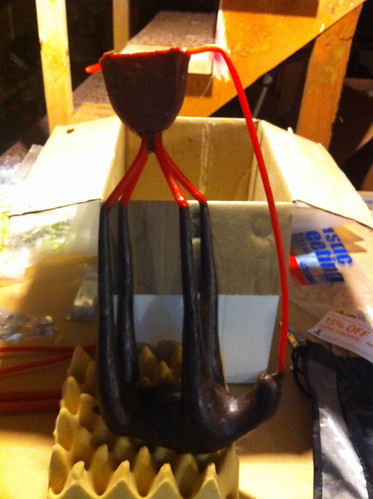
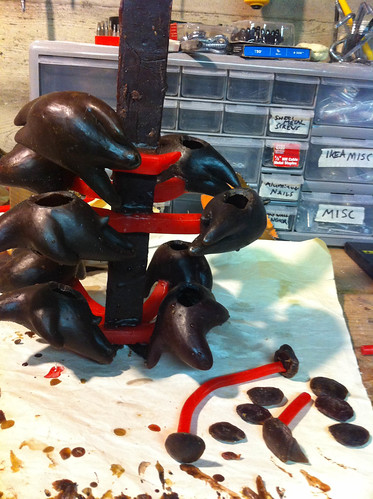
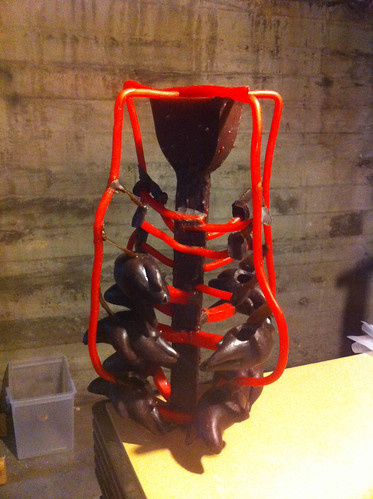
However, once you have your wax piece finished, there is still a very critical step to undertake before your piece is ready for investing in plaster. You have to sprue and vent the form. Early on, I explained how the wax form would eventually be transformed into a void in the plaster mold, one that will be filled with molten bronze. The sprues are the attached pieces of wax that will act as channels through which the bronze will flow to reach sculpture. For some reason, sprue wax is often red. It’s still wax, though. Vents are related to sprues. They’re attached to give air an exit path as the bronze is poured in. You have to consider how to sprue and vent the piece to insure that the bronze flows smoothing and evenly through out the whole form. This was fairly easy to accomplish on the Walker. The little odalisques, however were a bit more complicated.
One other aspect of the getting the pieces ready to be invested is that if the forms are hollow, you have to have an opening where the investment can flow inside of the forms. For the little Odalisques, this meant I had to cut tiny lids in their backs. You can see how each is being attached to the sprue tree, like tiny delicious brussels sprouts. The investment will flow into each opening, ensuring the bronzes stay hollow. However, this also meant I now had nine tiny lids to sprue and vent, along with all nine odalisques. The lids will be welded back on, after casting, using TIG welding. However, that’s something I’ll cover in the second post – investment and beyond!
Hi Eva, I really like your work (particularly the odalisques), and enjoyed your blog about your first bronze castings. Interested to see how you use silicone caulking – I’ve always pumped it into soapy water and pressed it onto the master, rather like pressing clay into a mould*, your way looks like it would achieve better detail. Do you paint the caulking on with a brush? Lately, for very small items, I’ve been using silicone putty (for cooks) – expensive, but very handy.
*That’s the method I used for the mould for the large heads shown on my website, the ones in Cabinteely Park. They were cast in crushed granite and white cement (concrete, basically), I took 8 castings from each mould, the castings were one and a half tons, so the moulds had to be very tough.
Hi there,
Just stumbled across your site and love your work! I am a fellow artist and trying to research a few things before I attempt to do my own bronze casting at home. Wondering what type of plaster you are using for the investments? Referencing this photo, https://www.flickr.com/photos/genkigecko/8261842213/in/album-72157632219508182/ also wondering what you are doing here to avoid bubbles on the wax! Would love any advice you have. I bought FOV investment plaster from Rio Grande. Hoping that will work fine for casting bronze? I’m used to doing ceramic shell.
Lovely to see your work.
Cheers!
Molly