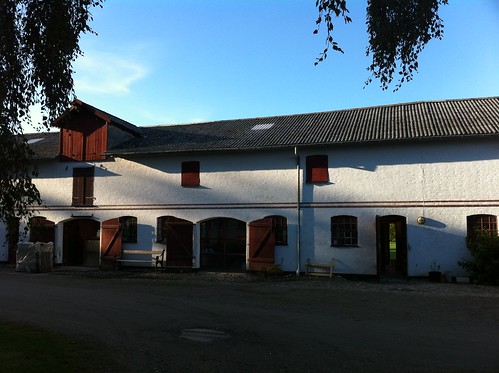
Guldagergaard week 3 – Soda Time

It’s been a very busy week, but then again, I suppose nearly all of my weeks here have been and will be very busy. With only five week here, time seems to go by so quickly.

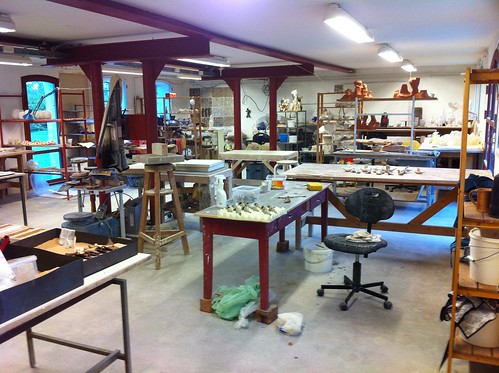
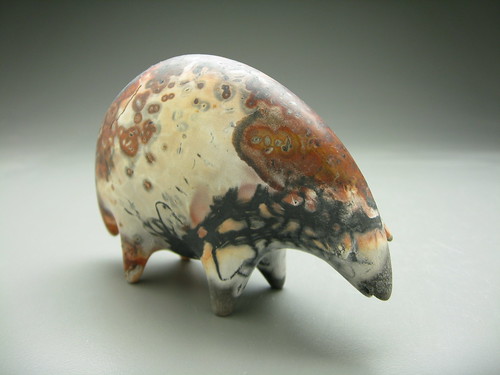
Anyway, the first half of this week was consumed by finishing every possible sculpture I could, so they could be soda fired. The plan was to load the big bisque kiln on Monday, giving it plenty of time to cool before we loaded the soda on Thursday.It’s been a bit rough doing my main firing only 3 weeks into my time here, but fellow artist Jody was about to return to Canada, meaning if we wanted to fire together we had to fire this week.  It’s worked out for me though, since I managed to finish 90 flying beasts, which wasn’t far from my goal of 100.

Unloading the bisque

So after about a full week of last minute frantic studio work, Jody and I loaded up the Guldagergaard wood-soda kiln on Thursday. The kiln is a small little beast, with a capacity of 300 liters/ 10.5 cubic feet. It’s also a very different type of kiln for me, since I’ve only really fired an anagama and a train kiln.  This guy is a cross draft kiln, with a firebox located underneath the ware chamber. It’s weird.  It wasn’t like stoking a firebox, it was like stoking a conveyor belt. It wasn’t so much much a rhythm of “stoke, see how the temperature responds, adjust”, as it was a constant process of stoking, gradually pushing the wood further in the the kiln, and constantly adjusting.  It was like switching from a Sousa march to one of the Bach cello suites. Looking around online, it visually looks a bit similar to the “phoenix kiln” in a book by Jack Troy, which was mentioned on Carl Gray’s website. The main differences are the fact that the firebox has a flat, not arched roof, and the chimney is on the side, not the front.

Anyway, due to some last minute kiln maintenance work, we didn’t get the kiln started until about 9pm on Thursday night. The plan was to fire for about 20 hours, waiting to put the soda into the kiln until cone nine on the bottom of the kiln had fallen. Sounds good, as far as plans go.  However, life is seldom that simple. By hour 22 or so we had cone 9 down on the top, but had barely moved cone 8 on the bottom. It took easily another 4 hours of struggle before finally dropped the lower cone nine, by which point we’d also dropped cone 11 on the top of the kiln.  In all, the firing took us 28 hours, which was pretty exhausting for just two people, especially since we were also constantly splitting  more wood.

Richard prepping the soda bombs

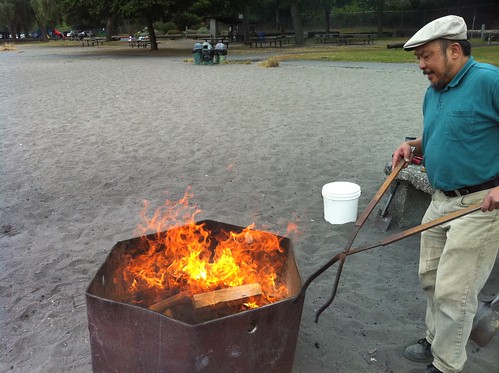
Richard, the tech, had to leave for the night before we were ready to put the soda in the kiln, but here’s a shot of him explaining the soda balls to us. We were using a method developed by Gail Nichols, generally referred to as soda balls/bombs/burritos.  In previous soda firings that I’ve done, people have used the more traditional method of spraying in a mixture of water, soda ash, and sodium bicarbonate into the kiln. However, it seems like Nichols’s soda bomb method is taking off, which is understandable if you’ve seen how amazing her work looks. Basically, you mix soda ash, sodium bicarbonate, and whiting together, and add just enough water to form it in to balls. These balls then solidify to rocks, which you then dump into the firebox.  The soda then vaporizes in the firebox, distributing itself around the kiln.  I haven’t done much soda firing, but I would love to play around with it some more if the results from this firing are promising.

dawn over the wood pile

Anyway, at this point, we’re stuck waiting for the kiln to cool, and catching up on sleep. I’ll let everyone know what the results look like once we unload it!

Guldagergaard week 1

I’ve been at Guldagergaard for a week now. Strange to think I’m already 1/5 of the way done with my time here. It’s been a pretty cool experience so far, and is clearly a great community.
IMG_2048

GG is set up so that various artist come in from all different countries, staying in an old manor house, and working together in the studios, which at one time were the horse stables. We presently have 7 artists and assistants from Finland, Denmark, Canada, and the US, with a number of other folks wondering in for a day or two. The assistants spend part of the day firing kilns and what not, but work on their own projects too. We’re all working on our own work, but since we’re in a communal space, it’s a great set up for exchanging ideas and theory. The work of the other artists range from functional ware, to figurative sculpture, to wonderfully abstract glass pieces. The glass artist is here in order to figure out how to incorporate ceramic material into her pieces.
While everyone put forward proposals about what they’d be working on while they’re here, the set up is so inspiring and filled with new ideas that they may end up working in the entirely opposite direction. My proposal was to build a giant swarm of flying creatures as an installation. While I have quite a few additional ideas I think I’m going to explore, I’m going to keep going on the flying beasts as well at the same time.
IMG_2073

Guldagergaard itself is very cool, as well. In addition to wonderful assortment of kilns and supplies, it also has extensive library of ceramic related reading material. And that’s not even mentioning its actually collection of ceramics, both in its gallery and in the house! I’ve been making sure to use a different mug every day, but I still need to go spend some time staring at the amazing work in the gallery. It’s tough to avoid feeling intimidated by the sheer amount of incredible work around.

IMG_2100

It’s also located in the middle of a public sculpture park, with random members of the public wondering by on their bikes, and occasionally sticking their heads into the studio. My favorite part of the sculpture park is a giant earthwork spiral mound. By walking around it, you eventually reach the flattened top with a view of windmills, housing developments, and fields. When I walked to the top today, I walked right by a hare, hunkered flat, trying incredibly hard to convince me of its own invisibility.

GGhill2

My average day seems to be chunks of two to three hours in the studio, interspersed with exploring, eating, and talking with the other artists. I have access to a bike, and often take off in a random direction with a thermos of tea and my sketch book. The movement and the sight seeing helps me think. I’m generally in the studio until after 11 at night, which is actually a fun change for me – reminds me of my college days.
So that about sums up my observations on the place so far. It’s just a really great place to be and to be making art. I’ve uploaded some of the pictures I’ve taken so far to flickr!

Pit firing

I recently had a chance to do a pit firing with Hilary Chan. He’s a great guy with a fairly fascinating ceramics blog. One of the most exciting things about doing the pit firing with him is the way he approaches it so scientifically. He’s from a tech background, and has made a scientific approach a key part of his artist process. While I try and take the occasional note (seldom referring back to them), this man is as thorough and as consistent as I could ever dream to be . He photographs every piece during ever stage of preparation and firing. He works to build theories from his notes, striving to prove or disprove them every firing. As someone from a scientific background myself, I found it awesome and inspiring. The whole experience has impressed in me the idea of pit firing as a petri dish, a small scale arena to experiment and explore, as I wait for the fall wood firing. Anyway, scientific musing aside, I figured it would be fun to explain exactly what a pit firing entails.

Pit firing is a very primative firing method. By primitive, I don’t mean unsophisticated, but rather ancient. Basically, as most cultures developed ceramics, some sort of pit firing was first way that folks figured out how fire their pots. It’s pretty low temperature, which means the finished pieces aren’t super sturdy and can’t be covered in glaze, like you can with higher temperature firings. However, it’s hot enough the pot isn’t going to dissolve back into mud if you put water in it, which is pretty darn useful for an emerging civilization. While most cultures figure out how to build kilns, and to heat their pottery to higher temperatures, some stuck with pit firing, developing the method to create incredibly beautiful work. The example that always comes to my mind is the pueblo potters of the southwest united states, including the beautiful black on black work by Maria Martinez.

There seems to be nearly infinite ways of setting up and doing a pit firing, so I’m going to stick to describing the pit firing I did with Hilary. We did the largest bit of preparation before hand. Each piece was wrapped in copped wire (specifically, a choreboy, those copper things made for scrubbing pans.), followed by steel wool, followed by salt water soaked burlap or straw. All of the salt, the copper, and the iron all fume at high temperature, leaving an assortment of colors on the clay. Once that initial prep was done, we placed each one in a labeled brown paper bag, ready for the fire pit. For my pieces, we had to experiment some, putting protective grills above the pieces, to avoid snapping of wings and beaks. I feel like figuring out how to protect my delicate beasts is going to be the biggest issue  for my exploration of pit firing. As we loaded the pit itself, we put down layers of sawdust, copper carbonate, horse manure,  paper, and wood. I actually made a timelapse of the whole loading process that sums up the set up pretty well.

The whole firing, once we lit it up, took maybe an hour. We had campfire sized flames for even far less than that.  The only time issue was the cooling of the pieces. We let everything cool for an hour or two, before my impatience got the better of me and I started digging out pieces. The results were great, but the rapid cooling just proved too much for pieces, leaving several with cracks. Apparently, the number one way to avoid this is to let the pieces cool in the ashes over night, which brings me back to the idea of my very own mini-firepit, in my very own backyard.  I have some plans as far as that, but that’s for another time.

Smooth Back Beast, 2010

Etsy shop!

I just got around to setting up an Etsy shop. I’d been playing with the idea for a while, and finally took the plunge! Here it is. I’ll be tweaking it and incorporating it more into my site over the next few weeks.

Off to the wood firing!

As folks who have been following my twitter might have guessed, I’m about to head out for a woodfiring! I’ve just finished packing up several months worth of critters, who will loaded into the kiln this Saturday and Sunday. They’ll be unloaded in two weeks on Saturday, November 28th.
Most of these guys will then be going directly to the Island Gallery on Bainbridge Island, for their December show, “Beauty and the Beasts”. I’ll be featured along side their annual fashion show. Some will be coming to my studio’s annual holiday sale and party. Stay tuned to my twitter for updates on the firing!