Guldagergaard week 4

The past week has been an odd mix of very busy and very relaxed.  We finished the soda firing last Friday, and I spent the weekend relaxing and starting some preliminary work on the installation frame. However, as soon as Monday came, life kicked up into full speed once again.

Mette, the wonderful director here at GG, has arranged it so I could install “Swarm” temporarily in a local elementary school. We met with a school official Monday morning, who asked when I could start installing it.  Despite the fact that the pieces were all still in the kiln at the time and the framework was barely started, I decided to be optimistic and said I could start on Wednesday.   This was setting myself up for a lot of work in a short period of time, but then again, that’s what I’m here in Denmark to do!

Jody with the mega sculpture

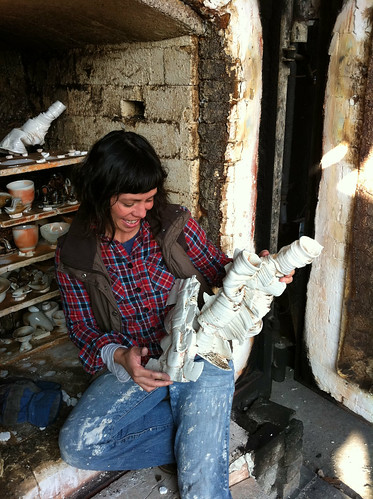
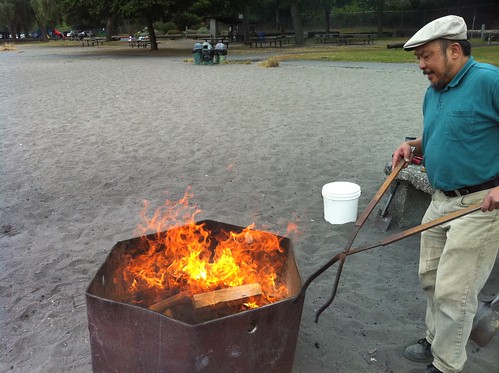
As soon as I got back from the school, it was time to get the kiln unloaded and get myself to work.  While I was fairly happy with how my work came out, but it  turned out the soda firing held some surprises. The main one was the way that Jody’s work reacted to the firing. Her work is made of thrown porcelain which has been cut apart, manipulated, and reassembled. While it’s visually all about movement, we weren’t expecting the fact that the pieces themselves moved a huge amount during the firing! Every nearly single piece warped, fell or tilted. The mystery of the overly long and difficult firing was solved when we discovered that two to three pieces of hers had fallen into the firebox, blocking off most of the path of the flame into the kiln. In the end though, she seemed ok with some of her results, and started to get excited about some of the new creations that formed as a result of the firing.

Soda fired fliers!

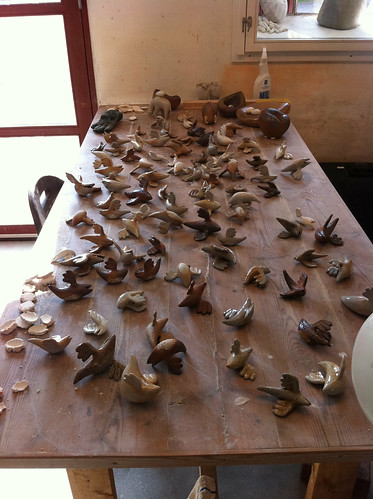
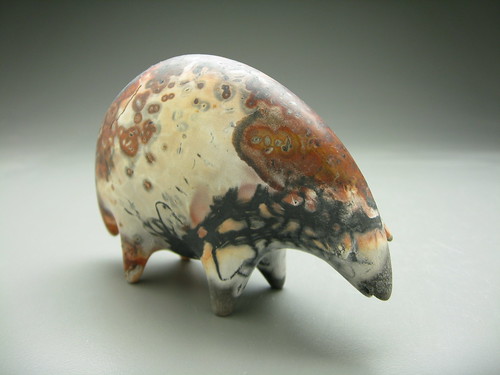
On my part, I didn’t loose a single piece, which is a very luck situation. Overall, while I’m still not sure soda firing is really for me I’m still quite happy with the results of this firing. It seemed to have work especially well with Swarm. Anyway, as soon as my pieces were out of the kiln, I got to work on the installation framework.  It was my plan to make a wooden frame containing a metal grid.  Each flier would be hung from parallel strands of fishing line, which would run up to a stick that’s a bit longer that the mesh work of the grid.  That way, hanging each flier from the grid would be as simple as slotting the stick through the grid and letting it catch, like a button on a coat. While this worked as well as I hoped it would, the frame and hangers took no less that five trips to the hardware store along with many many hours of very hard work. I also totally owe my friend Rachel Van Wagoner who spent several hours helping me string fliers on fishing line.

making progress

However, in the end, everything came together for Swarm.  I’m extremely happy with how it’s worked out. It’s taken weeks of hard work and hours spent walking up and down a ladder, but I think it’s all worth it.  This idea of thing hanging together in space is one that I keep coming back to, much like my city beasts.  In fact, my parents recently reminded me of a ninth or tenth grade math project, where I tried to build a three dimensional diagram of the golden spiral using ping pong balls and fishing line inside a plexiglas cube.  The end result was giant, clunky, and awful looking, but evidently planted some thoughts about space and sculpture that have stayed with me to this day.  It’s wonderful to finally have created something that properly explores those ideas. Here’s a brief video tour I made of it. The video accidentally got shortened by flickr, but I’ll be making a longer one with proper lighting soon.

Tomorrow I’ll be heading back to the school for an opening reception, complete with snacks, tours by some of the older students, and music sung by the students in the grand tradition of Danish fantasy ballads! It also apparently will include a speech, by me, to the students. I better go figure out what I’m going to say and see if I can finally manage to pronounce Guldagergaard in such a way that it doesn’t cause all Danes in the vicinity to burst into laughter.

Guldagergaard week 3 – Soda Time

It’s been a very busy week, but then again, I suppose nearly all of my weeks here have been and will be very busy. With only five week here, time seems to go by so quickly.

Anyway, the first half of this week was consumed by finishing every possible sculpture I could, so they could be soda fired. The plan was to load the big bisque kiln on Monday, giving it plenty of time to cool before we loaded the soda on Thursday.It’s been a bit rough doing my main firing only 3 weeks into my time here, but fellow artist Jody was about to return to Canada, meaning if we wanted to fire together we had to fire this week.  It’s worked out for me though, since I managed to finish 90 flying beasts, which wasn’t far from my goal of 100.

Unloading the bisque

So after about a full week of last minute frantic studio work, Jody and I loaded up the Guldagergaard wood-soda kiln on Thursday. The kiln is a small little beast, with a capacity of 300 liters/ 10.5 cubic feet. It’s also a very different type of kiln for me, since I’ve only really fired an anagama and a train kiln.  This guy is a cross draft kiln, with a firebox located underneath the ware chamber. It’s weird.  It wasn’t like stoking a firebox, it was like stoking a conveyor belt. It wasn’t so much much a rhythm of “stoke, see how the temperature responds, adjust”, as it was a constant process of stoking, gradually pushing the wood further in the the kiln, and constantly adjusting.  It was like switching from a Sousa march to one of the Bach cello suites. Looking around online, it visually looks a bit similar to the “phoenix kiln” in a book by Jack Troy, which was mentioned on Carl Gray’s website. The main differences are the fact that the firebox has a flat, not arched roof, and the chimney is on the side, not the front.

Anyway, due to some last minute kiln maintenance work, we didn’t get the kiln started until about 9pm on Thursday night. The plan was to fire for about 20 hours, waiting to put the soda into the kiln until cone nine on the bottom of the kiln had fallen. Sounds good, as far as plans go.  However, life is seldom that simple. By hour 22 or so we had cone 9 down on the top, but had barely moved cone 8 on the bottom. It took easily another 4 hours of struggle before finally dropped the lower cone nine, by which point we’d also dropped cone 11 on the top of the kiln.  In all, the firing took us 28 hours, which was pretty exhausting for just two people, especially since we were also constantly splitting  more wood.

Richard prepping the soda bombs

Richard, the tech, had to leave for the night before we were ready to put the soda in the kiln, but here’s a shot of him explaining the soda balls to us. We were using a method developed by Gail Nichols, generally referred to as soda balls/bombs/burritos.  In previous soda firings that I’ve done, people have used the more traditional method of spraying in a mixture of water, soda ash, and sodium bicarbonate into the kiln. However, it seems like Nichols’s soda bomb method is taking off, which is understandable if you’ve seen how amazing her work looks. Basically, you mix soda ash, sodium bicarbonate, and whiting together, and add just enough water to form it in to balls. These balls then solidify to rocks, which you then dump into the firebox.  The soda then vaporizes in the firebox, distributing itself around the kiln.  I haven’t done much soda firing, but I would love to play around with it some more if the results from this firing are promising.

dawn over the wood pile

Anyway, at this point, we’re stuck waiting for the kiln to cool, and catching up on sleep. I’ll let everyone know what the results look like once we unload it!

Pit firing

I recently had a chance to do a pit firing with Hilary Chan. He’s a great guy with a fairly fascinating ceramics blog. One of the most exciting things about doing the pit firing with him is the way he approaches it so scientifically. He’s from a tech background, and has made a scientific approach a key part of his artist process. While I try and take the occasional note (seldom referring back to them), this man is as thorough and as consistent as I could ever dream to be . He photographs every piece during ever stage of preparation and firing. He works to build theories from his notes, striving to prove or disprove them every firing. As someone from a scientific background myself, I found it awesome and inspiring. The whole experience has impressed in me the idea of pit firing as a petri dish, a small scale arena to experiment and explore, as I wait for the fall wood firing. Anyway, scientific musing aside, I figured it would be fun to explain exactly what a pit firing entails.

Pit firing is a very primative firing method. By primitive, I don’t mean unsophisticated, but rather ancient. Basically, as most cultures developed ceramics, some sort of pit firing was first way that folks figured out how fire their pots. It’s pretty low temperature, which means the finished pieces aren’t super sturdy and can’t be covered in glaze, like you can with higher temperature firings. However, it’s hot enough the pot isn’t going to dissolve back into mud if you put water in it, which is pretty darn useful for an emerging civilization. While most cultures figure out how to build kilns, and to heat their pottery to higher temperatures, some stuck with pit firing, developing the method to create incredibly beautiful work. The example that always comes to my mind is the pueblo potters of the southwest united states, including the beautiful black on black work by Maria Martinez.

There seems to be nearly infinite ways of setting up and doing a pit firing, so I’m going to stick to describing the pit firing I did with Hilary. We did the largest bit of preparation before hand. Each piece was wrapped in copped wire (specifically, a choreboy, those copper things made for scrubbing pans.), followed by steel wool, followed by salt water soaked burlap or straw. All of the salt, the copper, and the iron all fume at high temperature, leaving an assortment of colors on the clay. Once that initial prep was done, we placed each one in a labeled brown paper bag, ready for the fire pit. For my pieces, we had to experiment some, putting protective grills above the pieces, to avoid snapping of wings and beaks. I feel like figuring out how to protect my delicate beasts is going to be the biggest issue  for my exploration of pit firing. As we loaded the pit itself, we put down layers of sawdust, copper carbonate, horse manure,  paper, and wood. I actually made a timelapse of the whole loading process that sums up the set up pretty well.

The whole firing, once we lit it up, took maybe an hour. We had campfire sized flames for even far less than that.  The only time issue was the cooling of the pieces. We let everything cool for an hour or two, before my impatience got the better of me and I started digging out pieces. The results were great, but the rapid cooling just proved too much for pieces, leaving several with cracks. Apparently, the number one way to avoid this is to let the pieces cool in the ashes over night, which brings me back to the idea of my very own mini-firepit, in my very own backyard.  I have some plans as far as that, but that’s for another time.

Smooth Back Beast, 2010

Glowing beasts, past and present

A while ago, my husband and I teamed up to collaborate on some sculptures.  He’s a software developer by occupation, and we both appreciate the interesting world where tech and art overlap. We decided to work together, and have slowly been developing a series of glowing sculptures.  While it’s been a while since we finished the last one, we decided it would be fun to talk about some process, and share some of the programing and tech behind them.

Ever since I saw some translucent porcelain lamps made by Terry Inokuma, I’ve wanted to make a glowing creature.  The ultra white porcelain (Southern Ice) I use for teeth in my sculptures also has the property of being amazingly translucent, something I don’t normally pay attention to in a clay.   However, a couple years ago I decided to see what I could do with it.  The first creature I made to explore the idea of glowing creatures was Glowbelly, a little round fat beast, whose belly reminds me of a pale frog.  I used a mix of southern ice and my typical clay to make its belly, making it both paler and theoretically translucent.  However, we’ve never been able to find out for sure.  As soon as got the beast out of the kiln, it became clear that there were some aspects of electronic beasts that I’d neglected to take into consideration.  Namely, the ability to put wires into the beast, the ability to block excess light and direct the LEDS, and the all important on and off switch. While I had a loose idea of just sliding all the electronics in through the mouth, it became clear that much more planning would be required for glowing creatures.

The next step on our experimentation was the Industrial City Beast.  By planning ahead, we were able to set up easy access to power switches and wiring.  The wiring of the beast was very simple, just a battery, a few LEDs and a resistor or two.  (We started playing with the more complex wiring and microcontrollers later).  However, we discovered how important the quality of the light was.  The beast was to have glowing red eyes, but with the LED just in there, it was as empathetic as a laser pointer.  We experimented with a number of materials as diffusers, to give the beast a warmer glow.  In the end, we discovered shapelock plastic.  This semitranslucent plastic can be heated in boiling water and will become malleable, but hardens on cooling.  The stuff is great! It’s designed for rapid prototyping, and it can be reused indefinitely and machine tooled as well as hand formed. It solved two problems at once by both securing and diffusing the red LEDs in the neck of the beast.  The white LEDs for the city were reflected internally by covering all internal surfaces with tinfoil, which helped make the light less directional.

However, the present pinnacle of our collaboration together is the Glowback. We finished it up last year, but got distracted before writing about the process of making it. However, the process is still fascinating, and the result is one of our favorite pieces.

Like many of my woodfire pieces, the beast is a mix of different clays.  I used a mix of porcelain and stoneware for its body, southern ice porcelain for its teeth, and a mix of southern ice porcelain and B-mix porcelainious stoneware for the pods on the back.  This was so the body with have some grit and texture, the teeth would be white, and the pods would be pale and translucent from the southern ice, but still have some color and crystallization due to the B-mix. Since the beast isn’t very large, about 6″ long, the difference in shrink rates between the clays didn’t cause too many problems.  (Porcelain shrinks about 14% from start to finish, while stoneware will only shrink 10%.  If there’s long connected seams, the difference in shrink rate can cause the piece to crack.)

Each bulb on the back of the beast contains a super bright LED mounted in a styrofoam plug, which in turn is secured within the beast.  Two of the bulbs were removable, which while seeming adequate during construction, turned the wiring process into a laparoscopic surgery.  However after much swearing and and many minor burns from hot glue, all the LEDs were in place.

There’s 11 LEDs in all, and they’re controlled by an arduino microcontroller. (I can’t recommend arduino enough if you’re thinking about getting into this sort of thing.) We programed them to fade in and out in a vaguely hypnotizing pattern.  Since the arduino only has enough pins to control 6 things independently, the five largest bulbs pulse independently on random timers, while the six small bulbs pulse all at once. Figuring out the correct rate of fade involved some very interesting math. Here’s some videos of the different patterns we tried. My husband Ben’s blog post goes into greater depth about the programing and wiring.

Eventually, once all LEDs were in place, the arduino (we used a smaller arduino clone called a boarduino), was wrestled into place inside of the beast.  This ended up being the most difficult part of the process – I’d underestimated the amount of working room needed, and the amount of room the wires would take up.  In fact, lack of internal space, and the access to it was in generally the most challenging aspect of the sculpture.  Even the thickness of the wires factored into the difficulty – they keep popping off the dome that covers the power switch!

However, the end result is pretty awesome.  We had a huge amount of fun constructing it, and I believe it’s lived up to our expectations.  Since it’s a fairly experimental beast, it isn’t for sale. Here’s a final documentary video showing off the final completed beast.

New Timelapse Video

I just finished up the timelapse video I made of the creation of one of my saggar fired pieces.  I recorded the creation of “Cuckoos #2: Nest”.  It tracks the piece from the start to the bisque firing.  I particularity enjoy being able to see the process of burnishing the nest.  The video is on vimeo since it was just a hair too long for Youtube.

Sculpture Timelapse: Nest from Eva Funderburgh on Vimeo.